
Scenario Detail
In this scenario, we will set up an SAP AIF interface to process customer data received through an IDoc. The interface will be capable of creating and updating customer (passenger) master records.
We will use the following IDoc:
Message Type: FLCUSTOMER_CREATEFROMDATA
Basic Type: FLCUSTOMER_CREATEFROMDATA01
Step 1 - Define the Namespace
Transaction: /n/AIF/CUST -> SAP Application Interface Framework -> Define Namespaces
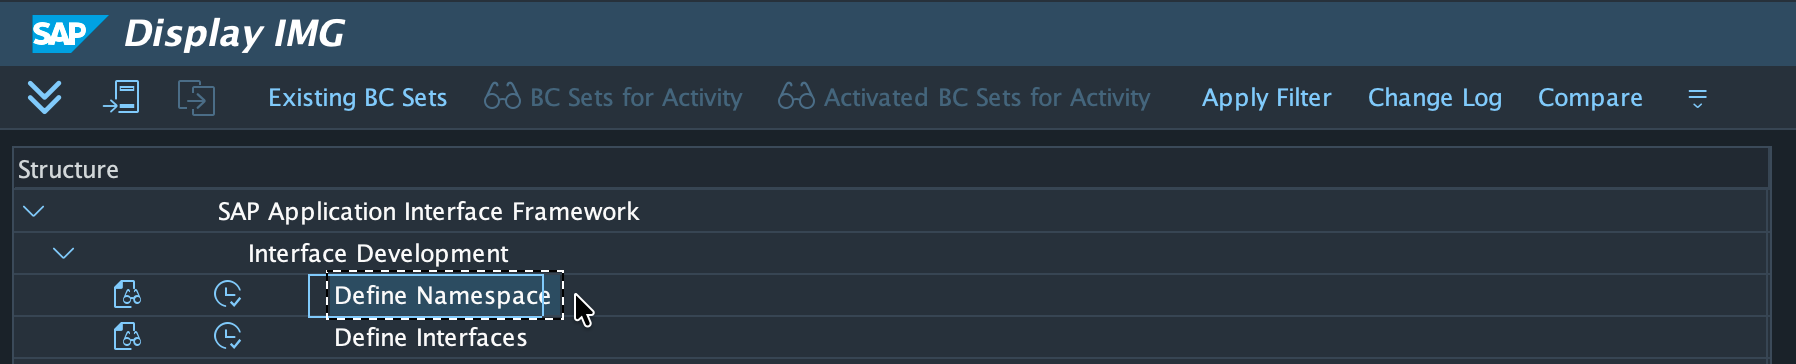
Navigate to transaction /n/AIF/CUST and create a new namespace. Alternatively, you can use an existing namespace. In this example, we will use the existing namespace ZDEMO.

💡 Tip
The namespace is the top-level container for all your AIF objects - interfaces, recipients, and value mappings all sit inside it. Using a consistent naming convention (e.g. Z + project abbreviation) makes it much easier to manage objects across a large system.
Step 2 - Generate DDIC Structure
Transaction: /n/AIF/IDOC_GEN
SAP AIF works with SAP Data Dictionary (DDIC) structures. However, IDoc basic types, which define the structure of an IDoc, do not have corresponding DDIC structures delivered by default. Therefore, before an IDoc can be monitored and processed through SAP AIF, a DDIC structure must be generated for the IDoc basic type.
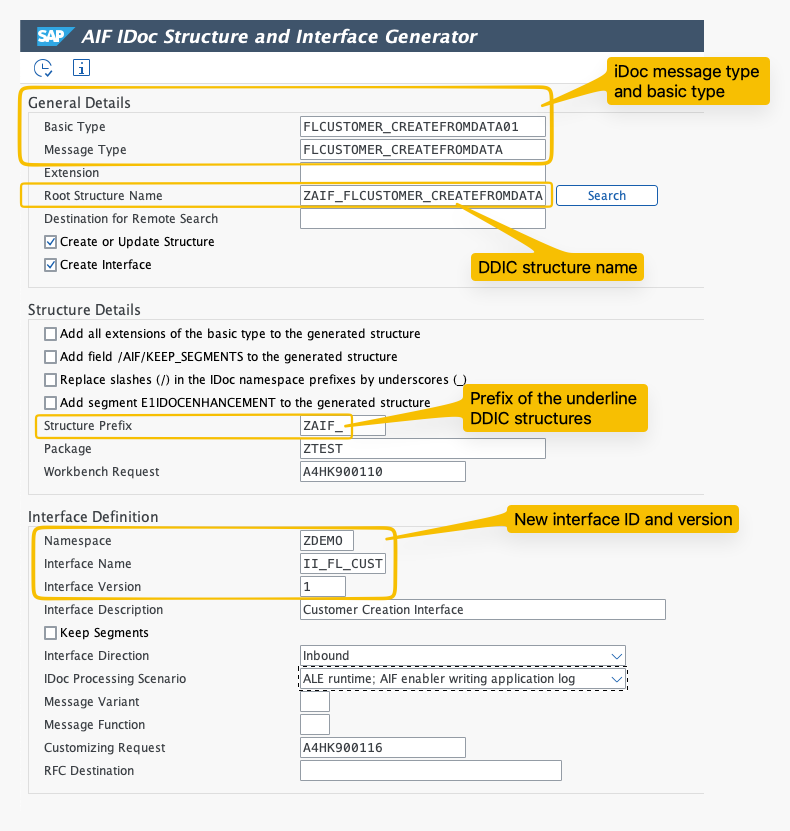
Open the IDoc Structure Generator using transaction /n/AIF/IDOC_GEN and enter the details of the IDoc you want to monitor.
💡 Tip
This step only needs to be done once per IDoc basic type. If a DDIC structure has already been generated for your basic type by a previous project, you can skip to Step 2.1 and create the interface directly in
/n/AIF/CUSTwithout re-running the generator.
Step 2.1 - Create the Interface
You can create the interface directly during this step. Alternatively, you can create the interface later using transaction /n/AIF/CUST.
To create the interface as part of the IDoc Structure Generator process, select the Create Interface option and maintain the interface details as shown below.
💡 Tip
The IDoc Processing Scenario field controls how AIF hooks into the IDoc processing. The option “ALE runtime; AIF enabler writing application log” is the most common choice for inbound IDocs - it means AIF runs as part of the standard ALE inbound processing and writes errors to the application log so they appear in the AIF monitor.
Namespace: ZDEMO or the namespace created in Step 1
Interface Name: II_FL_CUSTOMER
Interface Version: 1
Interface Description: Customer Master IDoc Interface
IDoc Processing Scenario: ALE runtime; AIF enabler writing application log
Customizing Request: Your customizing request
After maintaining the required information, execute the generation process.
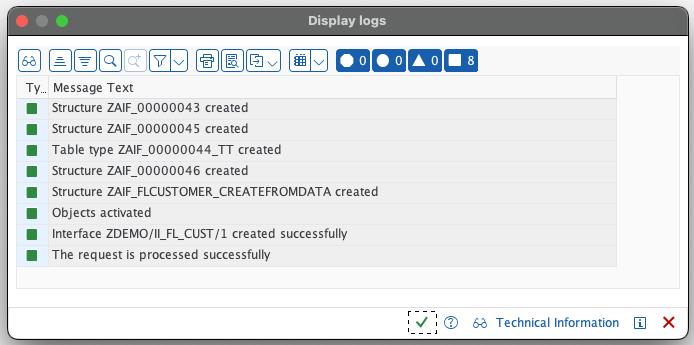
If the generation is successful, SAP AIF creates all required objects, including the DDIC structures and interface definitions. A confirmation popup is displayed showing the details of the generated objects.
If the objects are created successfully, you will have a log with all the objects like this.
Step 3 - Create Interface-Specific Single Index Table
Transaction: SE11
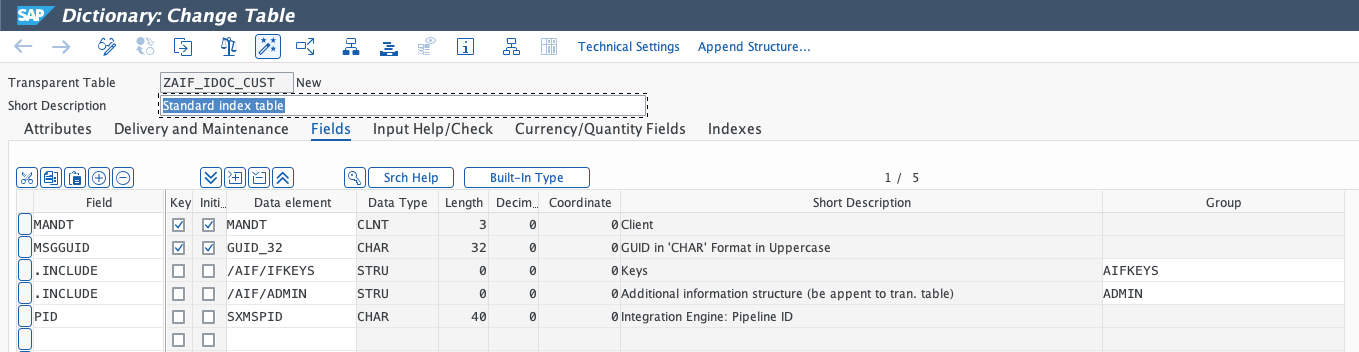
Go to transaction SE11 to create the index table. SAP provides a standard index table template that can be used as a reference. Copy the template table and create a new custom index table based on it. Make sure the new table follows the required naming conventions for your namespace and interface.
💡 Tip
To leverage the full capabilities of SAP AIF and to customize interface error handling and monitoring as required, an index table is typically needed. Therefore, it is recommended to always create an index table for your interfaces.
This index table is used by SAP AIF to enable message indexing and monitoring for the interface.
⚠️ Warning
You can switch the single index table later; however, messages stored in the old index table will no longer be visible in the Interface Monitor. Only new messages will be written to the newly assigned table.
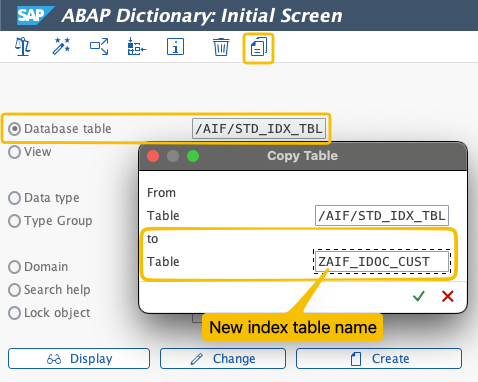
You can use the AIF index template table /AIF/STD_IDX_TBL and select Copy. Then, enter the name ZIDX_IXIFL_CUSTO for the new table and select Continue. When prompted, enter the package name you created earlier.
🛑 Required
Make sure to activate the table in SE11 before moving on. Without activation the index table does not exist in the database and AIF will not be able to write messages to it. You will get a runtime error the first time an IDoc is processed.
Step 4 - Define Namespace-Specific Features
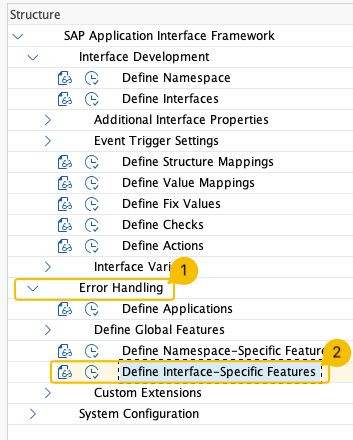
Transaction: /n/AIF/CUST -> SAP Application Interface Framework -> Error Handling -> Define Namespace-Specific Features -> Define Interface-Specific Features
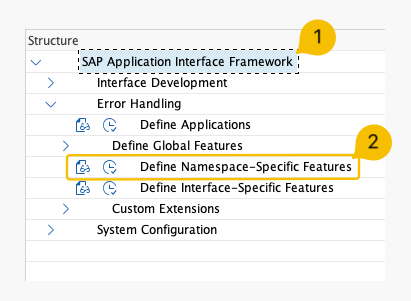
Next, assign the index table to the interface. Go to transaction /n/AIF/CUST and navigate to SAP Application Interface Framework -> Error Handling -> Define Namespace-Specific Features.
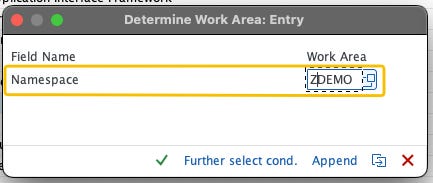
Enter namespace ZDEMO and continue.
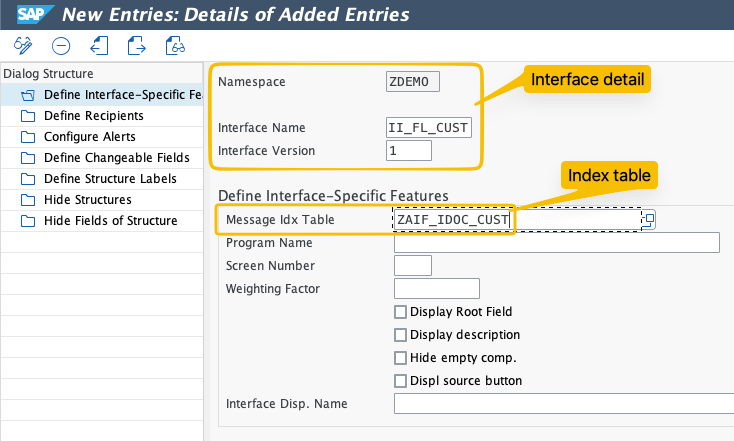
In Define Interface-Specific Features, choose New Entries and maintain the interface II_FL_CUST with version 1. In the Message Index Table field, enter the newly created index table ZAIF_IDOC_CUST and save your changes.
Step 5 - Create Recipient for Alerts
One of the main purposes of SAP AIF is to enable users to monitor interfaces through AIF monitoring tools. However, not all users should have access to all interfaces in the system. Therefore, users must be grouped into different categories so that access can be controlled based on business requirements.
In SAP AIF, these user groups are defined as Recipient for Alerts. Based on your organization’s requirements, you should create appropriate recipient groups.
For example, you can create one recipient group for users who should monitor all IDoc-related interfaces, and another group for users responsible for OData services.
💡 Tip
In a real-world scenario, access is typically restricted by functional areas. For instance, the Material Master team (PLM) may be given access to material-related interfaces, while the OTC team may be granted access to all sales-related interfaces.
Go to Customizing (transaction /AIF/CUST) and navigate to SAP Application Interface Framework > Error Handling > Define Namespace-Specific Features.
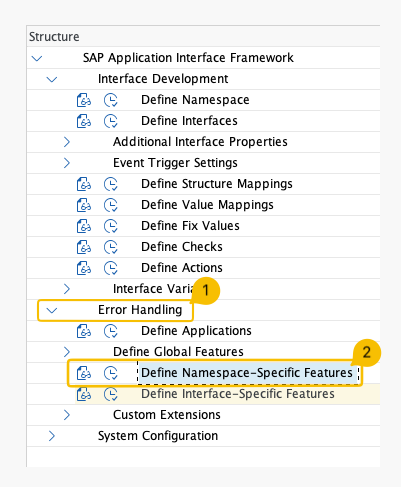
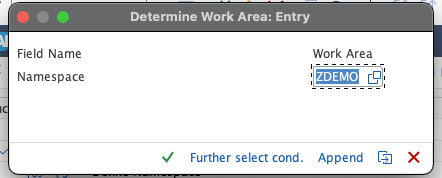
Enter or select your namespace ZDEMO and select Continue.
Navigate to Define Recipients by double-clicking it.
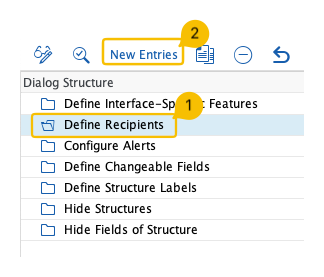
Select New Entries, enter a meaningful name for your new recipient.
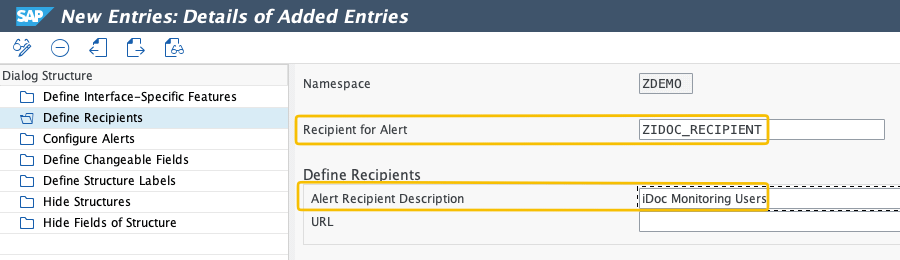
Step 6 - Assign the Recipient to the Interface
Transaction: /AIF/CUST -> SAP Application Interface Framework -> Error Handling -> Define Namespace-Specific Features -> Define Interface-Specific Features -> Assign Recipients Without Key Fields
Now assign the recipient to the interface. Go to transaction /AIF/CUST and navigate to SAP Application Interface Framework -> Error Handling -> Define Interface-Specific Features.
💡 Tip
Use Assign Recipients Without Key Fields when all messages for this interface should be visible to the recipient group, regardless of any business key values (e.g. customer number or company code). If you want to restrict visibility to only certain key values, use Assign Recipients with Key Fields instead.
Enter namespace DEMO_1, interface FCUSTOMER, and version 1, then choose Continue.
