
If you are new to Java mapping in SAP PI/PO you will be wondering how to edit an existing Java mapping. If you haven’t done it before it could become a complex task. This article aims to provide a step-by-step guide on how to edit an existing Java mapping using Netweaver Developer Studio (NWDS). If you have never worked with NWDS read my previous post on how to configure NWDS for PI/PO developments.
Overview of steps to edit Java Mapping using NWDS,
Find the Java Mapping which needs to be changed.
Download the .jar or .zip files.
Create new Java Project in NWDS
Import .zip or .jar files to Java Project.
Edit Java code.
Export Java Project as .jar.
Re-import the .jar file to SAP PI.
Netweaver Developer Studio should be installed and configured for PI/PO development before you can follow these steps. If you have not installed it, then read my previous post on how to configure NWDS for PI/PO development.
SAP Versions used in the illustration:
SAP PO 7.5
NWDS 7.5 SP 11
Step 1: Identify Java Mapping (Imported Archive) to be Edited.
Find the Java Mapping you want to edit either by operation mapping or directly accessing Imported Archives under Software Component Version. In this example, we will edit the Imported Archive “Java_copyPayload” which contains the java class “copyPayload”.
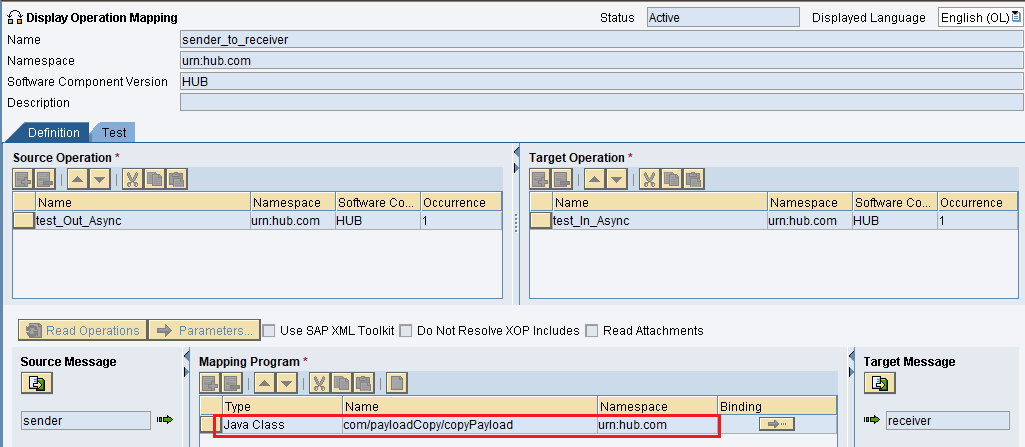
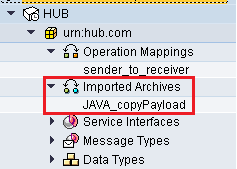
As an example, I have created a simple Java Mapping named JAVA_copyPayload to copy input to output.
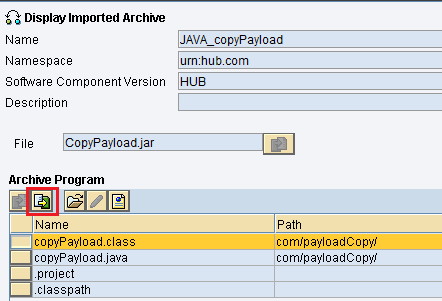
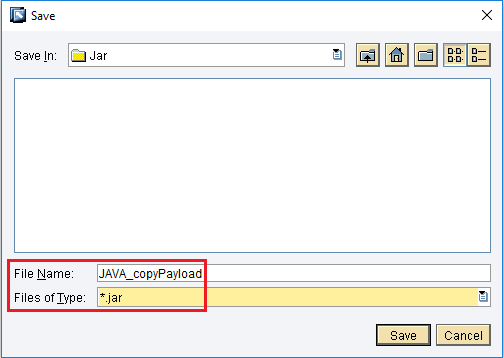
Step 2: Download Imported Archive as .Jar or .Zip file.
Download the Imported Archive as a .Jar file or .Zip file to local machine.
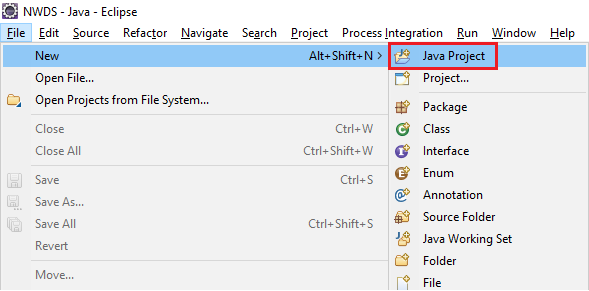
Step 3: Create New Java Project in NWDS.
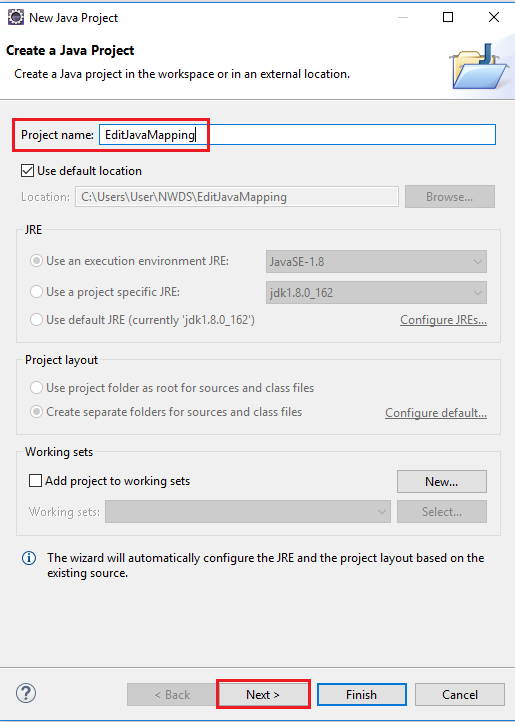
Open NWDS and create a new Java Project. Assign a suitable name for your Java Project.
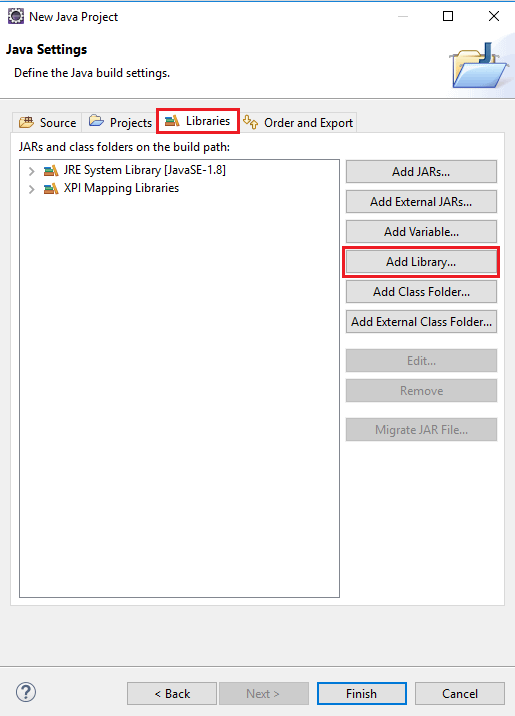
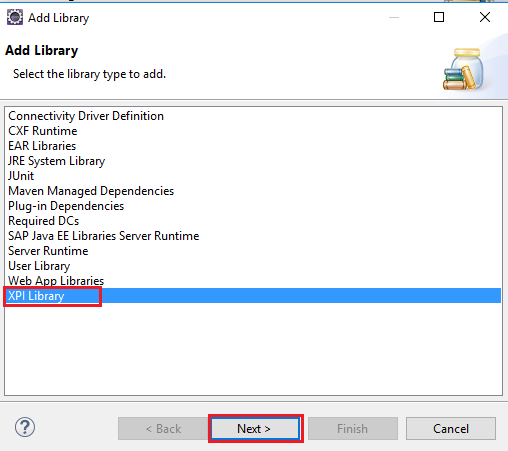
Import XPi library to your Java Project.
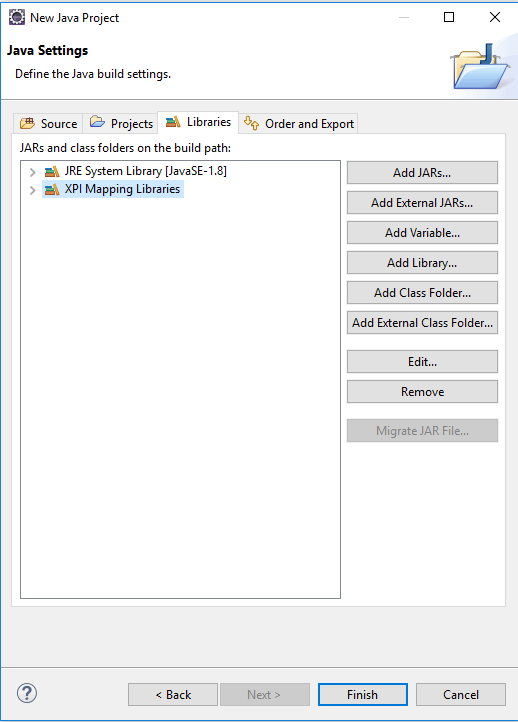
Step 4: Import .zip or .jar file of Imported Archive to Java Project.
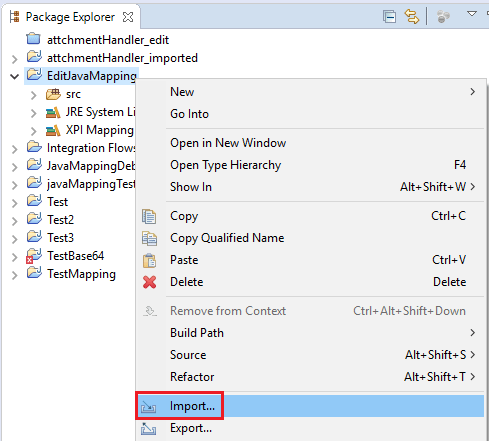
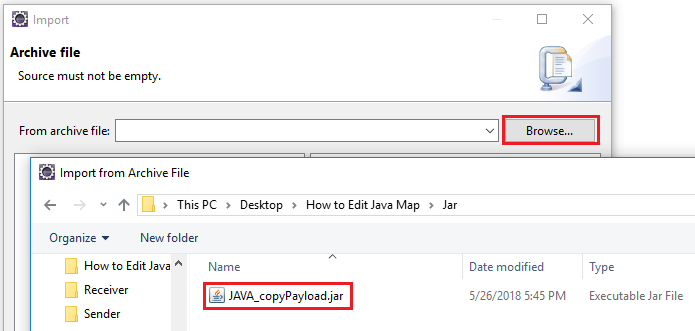
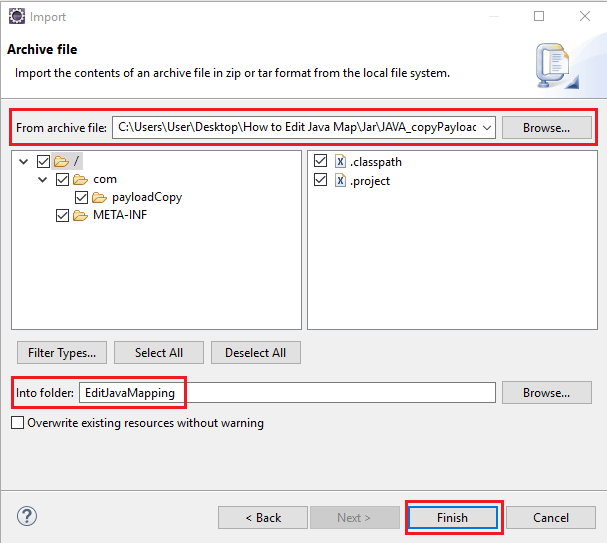
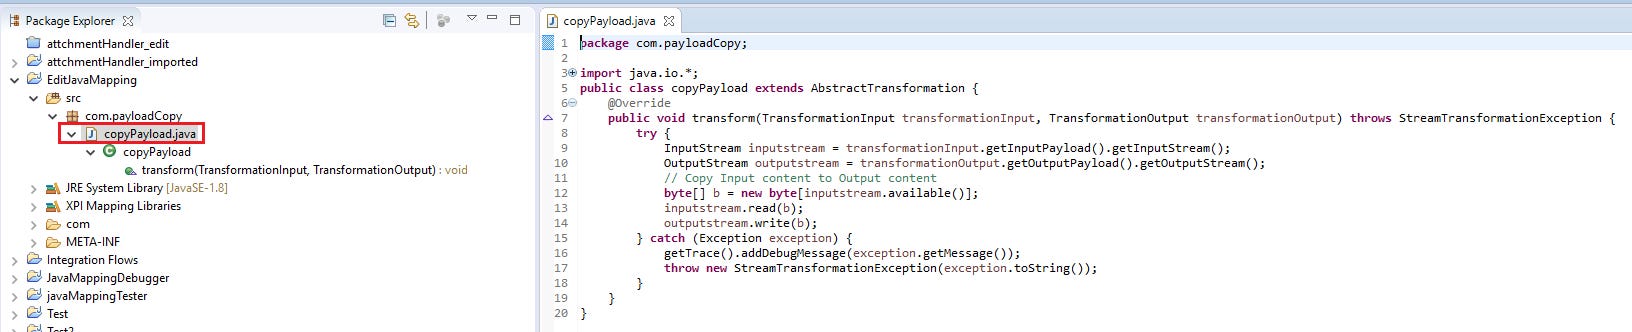
Sample Java mapping simply copies the input payload to output.
Step 5: Edit java Code.
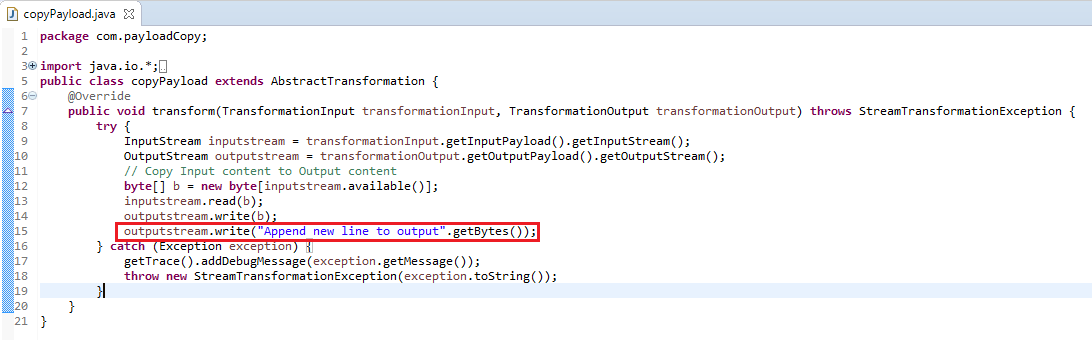
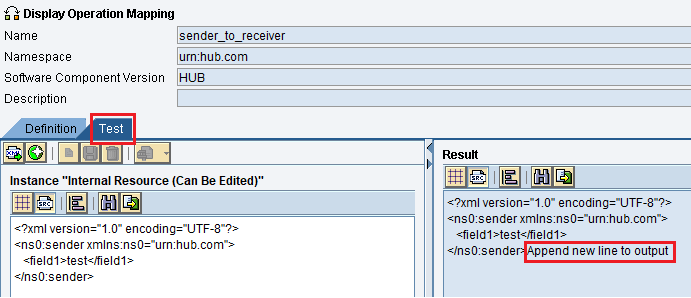
Every Java Mapping should implement the ‘transform’ method of extended ‘AbstractTransformation’ class. Java mapping in the example copies the input payload to the output. I have edited the mapping to copy new string to the output.
Step 6: Export Java Project as .Jar
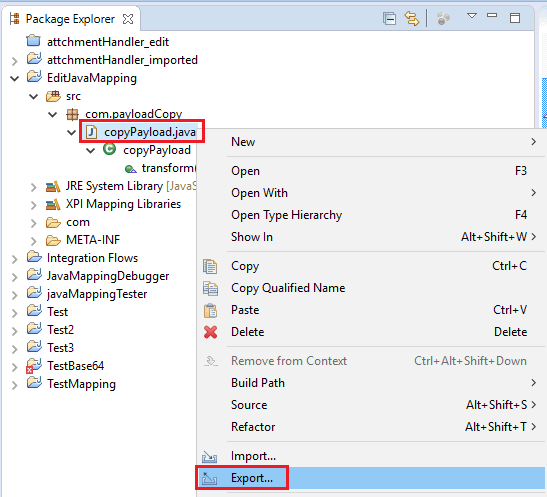
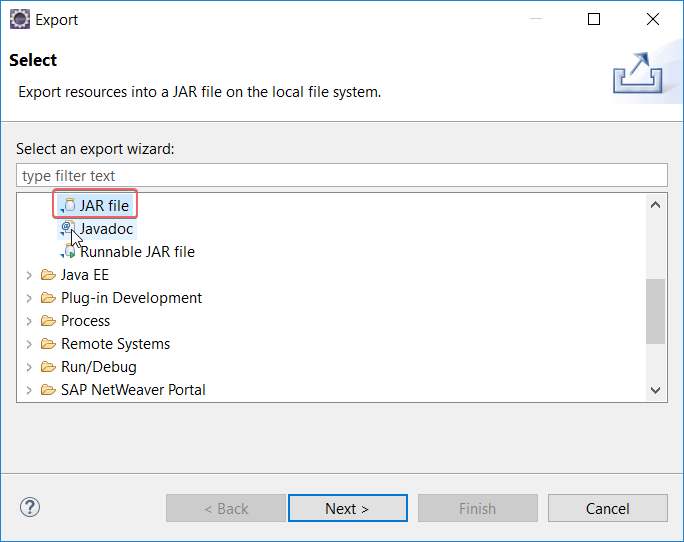
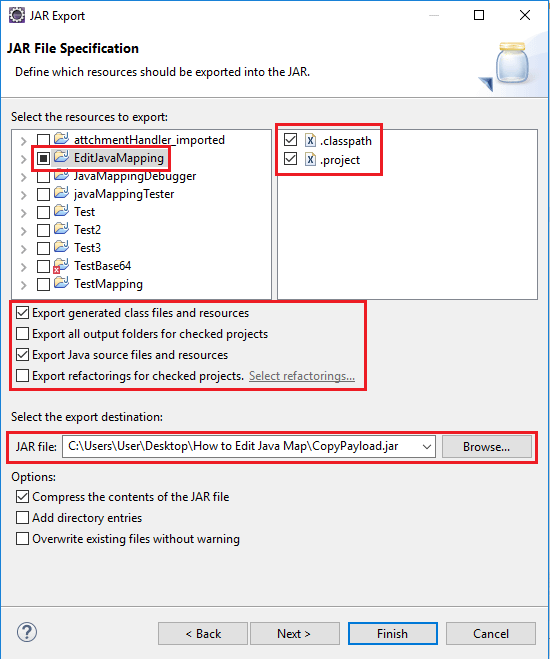
Step 7: Imported Edited .Jar File to Archives.
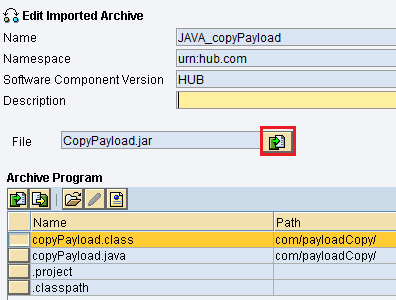
Save edited Imported Archive and activate it.
Step 8: Test the Java Mapping Changes.
If you have any questions on how to edit an existing Java Mapping program, please leave a comment below.
The post How to Edit Java Mapping Using NWDS appeared first on SAP Integration Hub.