
In EDI transactions, every message transmission is wrapped in an interchange envelope, and each envelope requires a unique Interchange Control Number (ICN). These numbers ensure that messages are traceable and prevent duplicate transmissions between trading partners. ICNs are a critical part of the EDI standard and play a key role in maintaining the integrity of the data exchange process.
For example, EDI segments ISA.13 (Interchange Control Number), ST.02 (Transaction Set Control Number) or IEA.02 (Interchange Control Number) are a few segments where unique sequence numbers are required. Not only these Control Numbers, but you can assign a unique number to any element of the message using Number Ranges. Another use case is setting a unique number to part of the generated file name.
In SAP Integration Suite (BTP-IS/CI/CPI) and SAP PI/PO, managing these interchange control numbers efficiently is essential for ensuring seamless EDI communication. This is where Number Range Objects come in. By using number range objects, BTP-IS-CI can generate and assign unique ICNs for every interchange, ensuring that each transmission is properly tracked and handled.
In this blog post, we’ll discuss how to use Number Range Objects in SAP CPI and SAP PI/PO, and explore different methods to retrieve or generate these numbers. The unique number allows us to avoid common issues like duplicates and facilitates traceability of EDI messages.
Steps to Configure a Number Range in SAP Integration Suite (BTP-IS/CI/CPI)
Practical EDI Integration Usecase Scenario
In this scenario, you receive a bulk EDI message containing multiple individual transactions (e.g., multiple purchase orders or invoices bundled together) to SAP Integration Suite. To process these efficiently, you first need to split the bulk message into individual transactions using an EDI splitter in SAP Integration Suite. Once the transactions are split, each one must be acknowledged with a Functional Acknowledgement (FA), such as a 997 in ANSI X12 or CONTRL in EDIFACT, which confirms receipt and validates the syntactical correctness of each transaction. To ensure each FA is unique and traceable, a unique control number must be assigned to each generated FA.
You can copy over the Control Number of the incoming EDI message and assign it to the FA generated. Or you can define a Unique Number Range and assign the Control Number from that. In this example, we will use the latter.
Understand the Pattern of the Number Range
The ISA13 element holds the Interchange Control Number, which is a 9-digit numeric value.
It is padded with leading zeros if necessary to ensure it is always 9 digits long.
ISA*00* *00* *ZZ*SENDERID *ZZ*RECEIVERID *211013*1200*U*00401*000012345*0*P*>~
In this sample ISA segment, 000012345 is the ICN. If you assign the value as 12345, it becomes an invalid EDI message.
Create a Number Range in the Integration Suite
Go to SAP Integration Suite and select the Option Number Range.
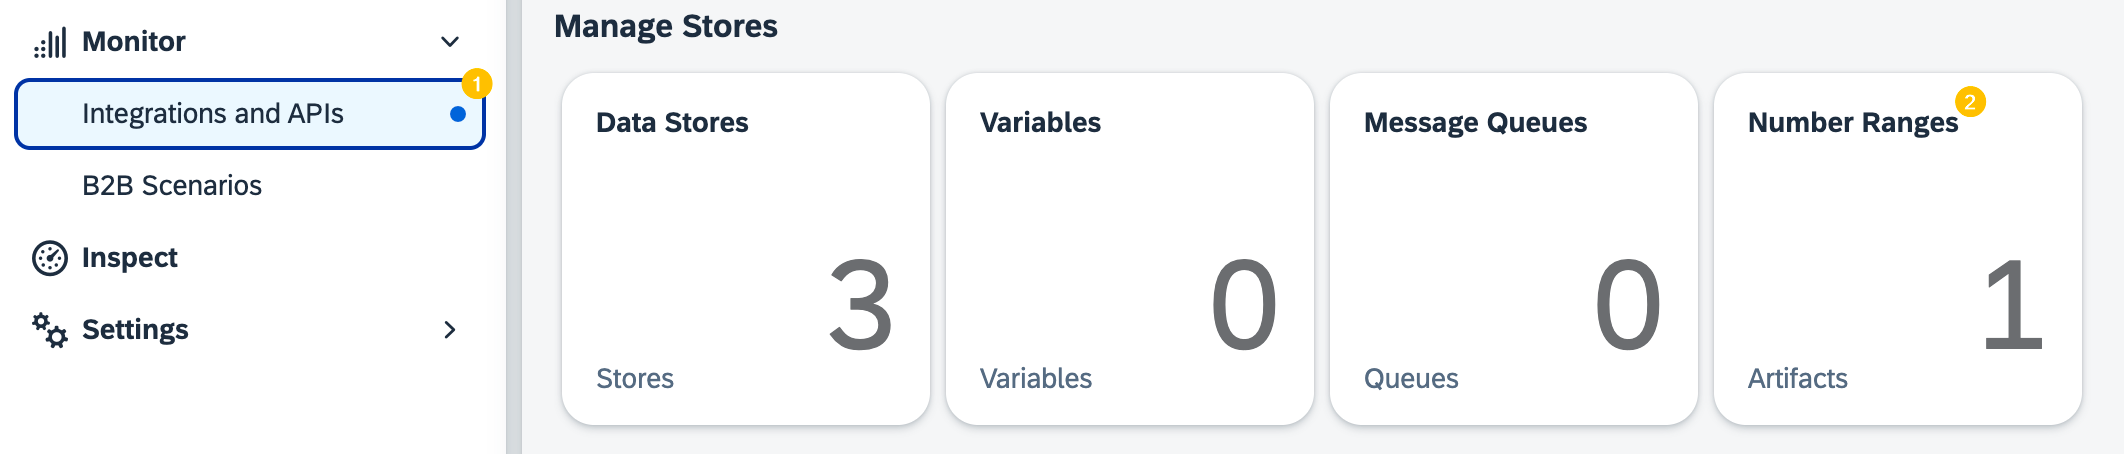
Create a new Number Range by using the option “Add“.
Assign a meaningful name and define the Minumum Value and Maximum Value of the Number Range. Also, configure the Field Length, in this scenario 9 digits.
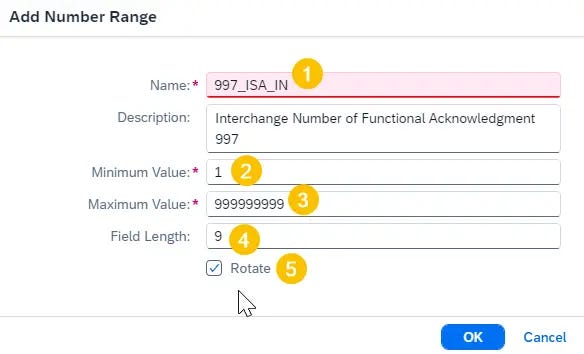
I will also activate the option “Rotate” so when the number range reaches the maximum value of 999999999, it starts back up from the minimum value, zero.
Configure the EDI Splitter and Configure the Interchange Number Option
Now I have activated the option to “Create Acknowledgment” to Required so EDI splitter generates FAs after splitting the bulk EDI file.
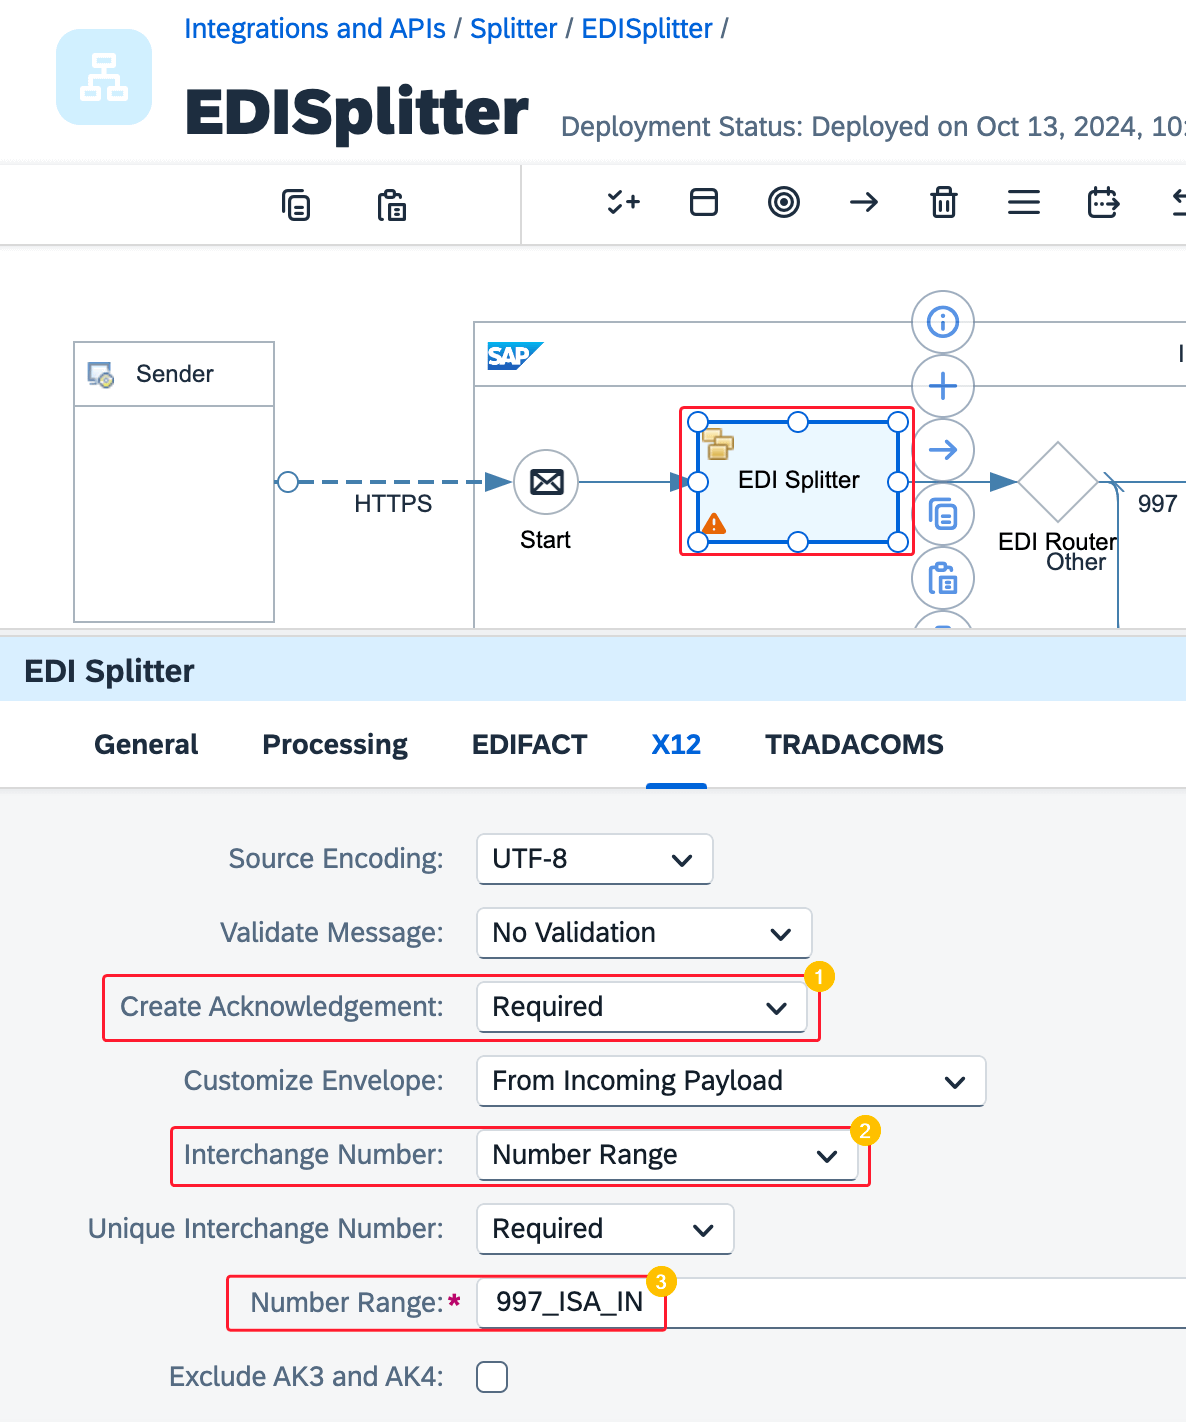
I have set the “Interchange Number” option to “Number Range” and provided the name of the number range object I generated in the above step.
Test the EDI Interface
Let’s trigger the interface with multiple transactions in the incoming EDI message body.
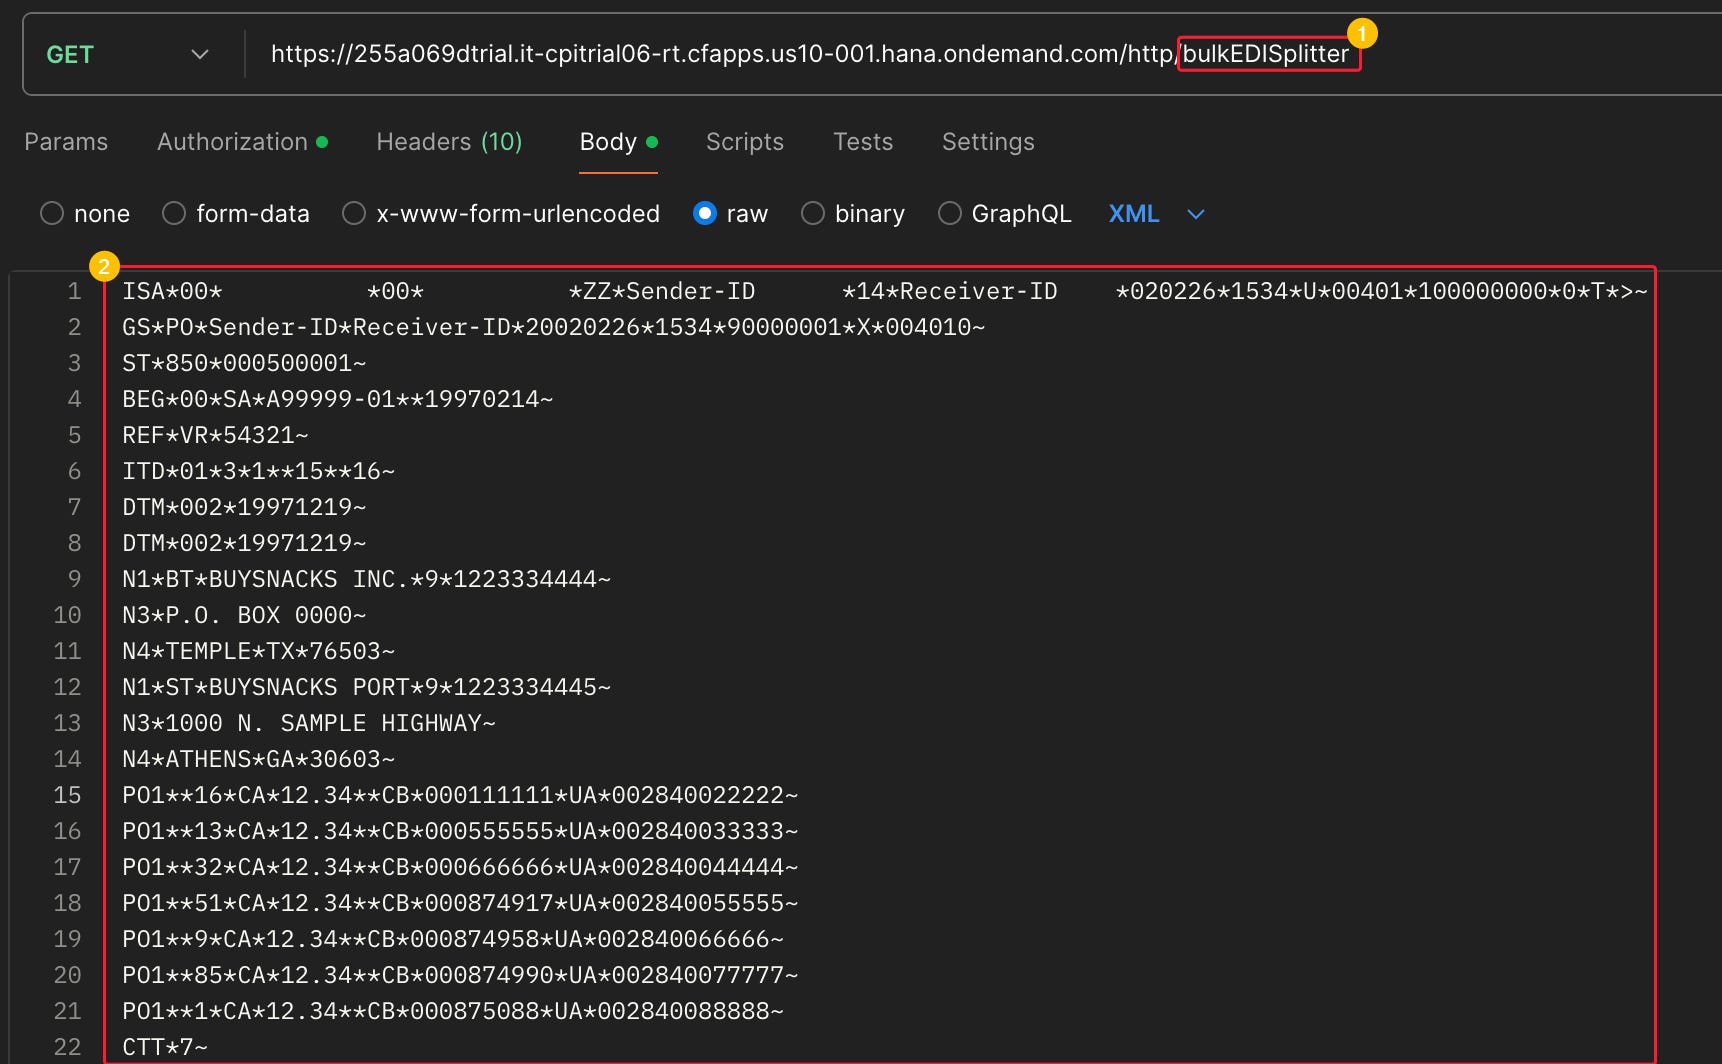
Notice the ISA Control Number of the FA 997 assigned from the Number Range.
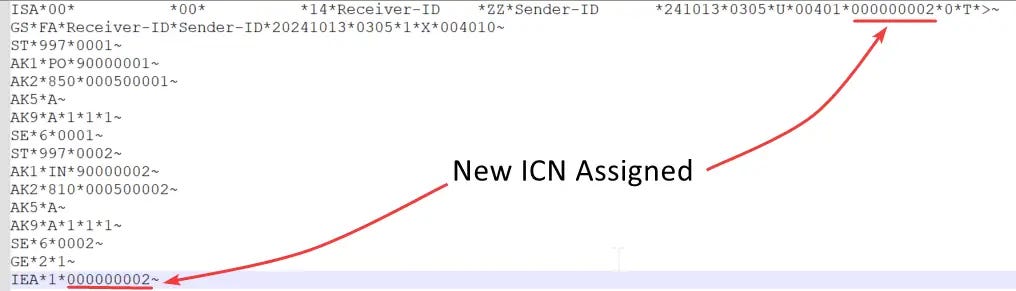
The number Range Status will be changed and it will show the next number inline.


Steps to Configure Number Range Objects in SAP PI/PO
Create the Number Range Object in B2B home.
Call the number range in message mapping and map the value to the target field.
Configure the receiver adapter modules to call the number range.
Let us look at these three steps in detail.
Step 1: Create the Number Range Object (NRO) in B2B Home
You should be able to access Netweaver B2B Integration Cockpit home using URL http://<host>:<port>/b2bic
Go to Number Range Object (NRO) Maintenance under B2B Home
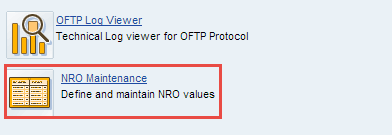

Provide the essential parameters such as NRO name, minimum value, maximum value, and number range length.
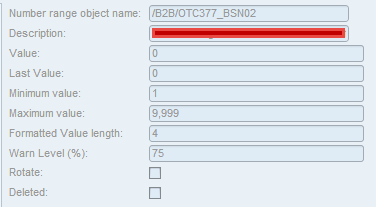
Step 2: Call the Number Range Object in Message Mapping and Map the Values to Target Field.
The number range should be mapped to the target field as below. Use a Constant to assign with the value in the format ‘$B2B_UEBNR<Number Range Name>$B2B_END_UEBNR’.
Assume our number Range Object (NRO) name is OTC377_BSN02.
Constant value should be configured as “$B2B_UEBNROTC377_BSN02$B2B_END_UEBNR”.


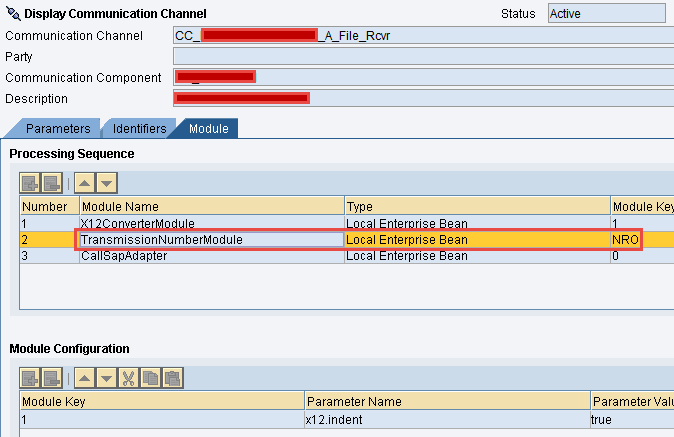
Step 3: Configure the Receiver Adapter Modules to Execute the Number Range Object.
In the receiver communication channel include the module “TransmissionNumberModule” with module key “NRO”.
If you have any question about Number Range Objects, please leave a comment below.
The post Number Range Objects for EDI in SAP Integration Suite (BTP-IS, CPI, PI/PO) appeared first on SAP Integration Hub.